
How to stop condensation in fridges: 2026 guide
2026-07-06 15:54:00
- Controlling temperature, airflow, and door seals effectively prevents moisture buildup in fridges. Persistent condensation indicates mechanical faults or neglected maintenance requiring professional diagnosis. Regular checks and proper storage habits minimize moisture issues and protect appliance efficiency.
Condensation in fridges is defined as the accumulation of moisture on interior surfaces caused by warm, humid air meeting cold temperatures inside the appliance. You can stop condensation in fridges by controlling three variables: temperature settings, internal airflow, and food storage habits. Brands such as Whirlpool, Beko, and KitchenAid each publish guidance on managing these conditions, and the principles apply across most domestic refrigerators. Addressing moisture buildup is not merely a cosmetic concern. Persistent condensation accelerates food spoilage, encourages mould growth, and forces the compressor to work harder, thereby reducing appliance efficiency and increasing energy costs.
What causes condensation in fridges and how to fix it
Fridge condensation, known technically as moisture ingress or internal humidity buildup, occurs when warm air enters the cabinet and its water vapour condenses on cold surfaces. The most common triggers are incorrect temperature settings, frequent door opening, and placing warm food directly into the fridge. Understanding which trigger applies to your situation determines the most effective corrective action.
Setting the correct temperature
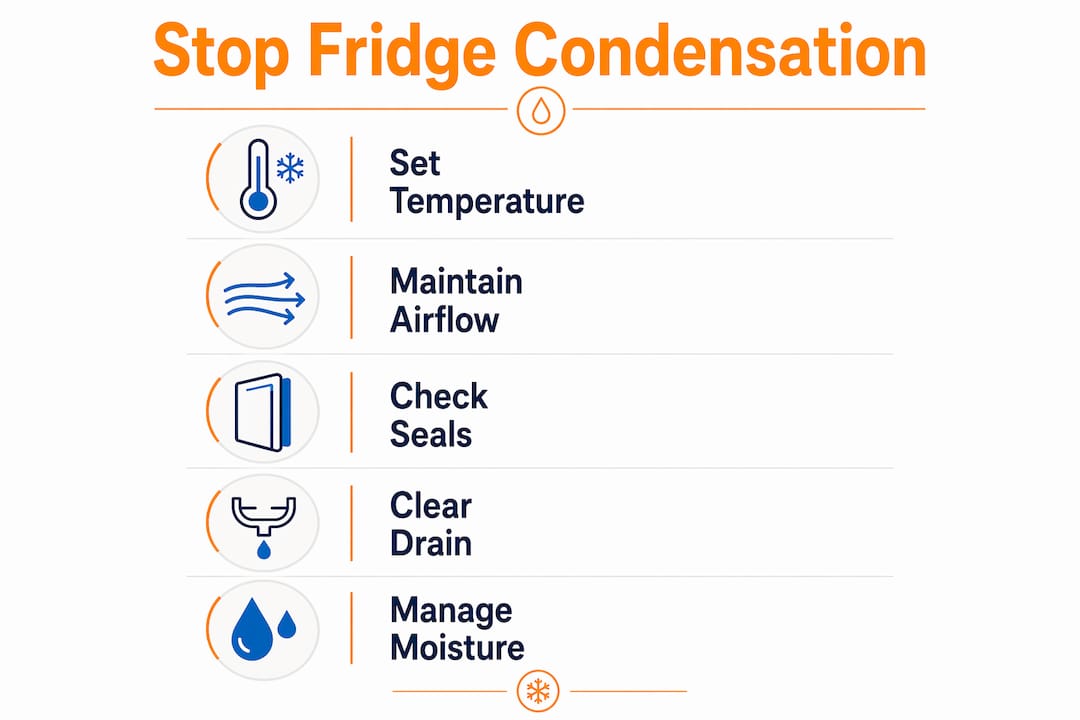
The ideal fridge temperature is 1.5°C to 3°C (35°F to 38°F), with the freezer set to -18°C (0°F). Temperatures outside this range either promote frost formation or allow the interior to become too warm, both of which increase moisture problems. After adjusting the thermostat, allow 24 hours for the temperature to stabilise before assessing whether condensation has reduced. Making further adjustments before that period elapses produces misleading results.
A less obvious contributor is placing hot or warm food directly into the fridge. The steam released raises internal humidity immediately, creating condensation on shelves and walls. Cooling food for 20–30 minutes at room temperature before refrigerating it reduces this effect considerably.
Pro Tip: If your fridge has a digital display, cross-check the displayed temperature with a standalone fridge thermometer placed on the middle shelf. Built-in sensors can drift over time, particularly in older Beko and Hotpoint models.
The following conditions each contribute to temperature instability and should be checked:
- Thermostat set below 1.5°C, causing frost and subsequent melt water
- Thermostat set above 3°C, allowing warm pockets to form and condense
- Fridge positioned near a heat source such as an oven or direct sunlight
- Door opened frequently or left ajar, admitting warm room air repeatedly
How does airflow inside the fridge prevent moisture buildup?
Condensation is a symptom of an unstable microclimate caused by blocked vents and poor airflow, not merely surface moisture. When cold air cannot circulate freely, humid pockets form in corners and behind densely packed items, and moisture accumulates rapidly in those areas. Addressing airflow is therefore as important as adjusting the thermostat.
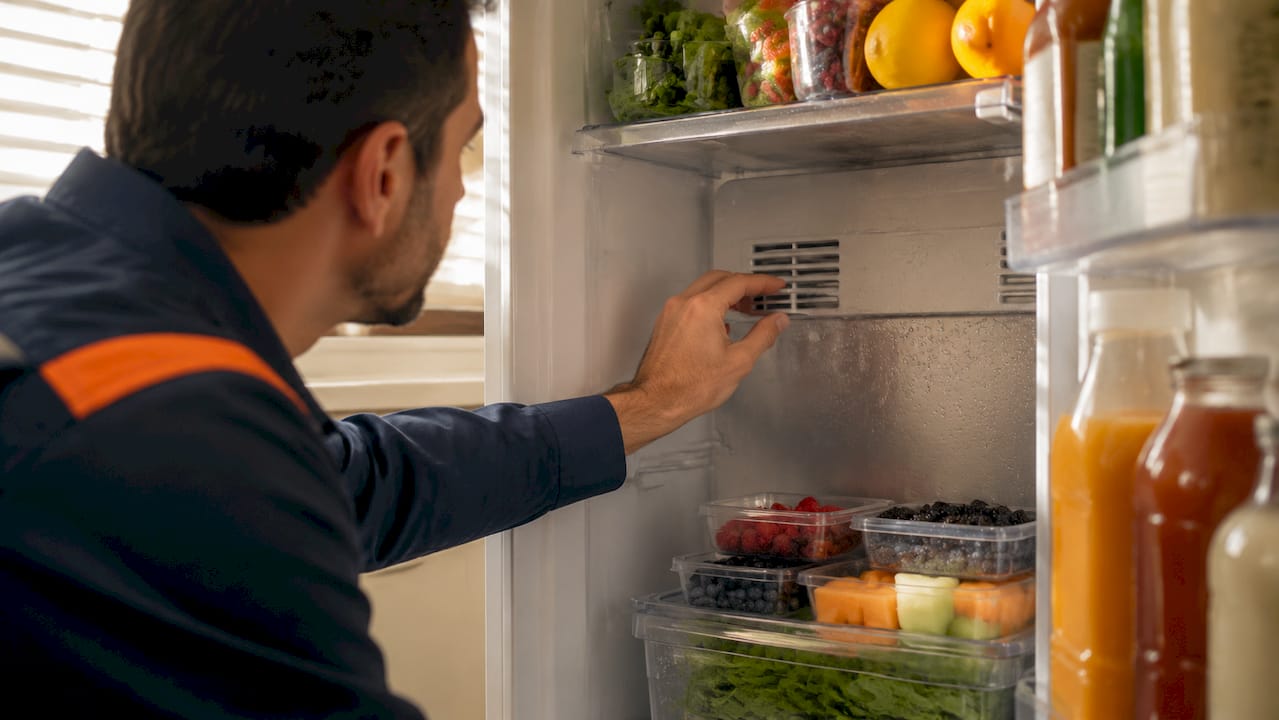
The internal fan and vent system in most modern refrigerators draws cold air from the freezer compartment and distributes it across the fridge shelves. When items are packed too tightly against these vents, the fan cannot maintain an even temperature throughout the cabinet. Overpacking blocks cold air circulation, causing humid pockets that accelerate condensation and food spoilage. Leaving a 2–3 cm buffer zone around air vents resolves this in the majority of cases.
Organising the fridge to support airflow requires only a few deliberate changes:
- Identify the location of internal air vents, typically at the rear wall or side panels, and ensure no items are placed directly against them.
- Remove any items stored in loose bags or open containers, as these release moisture continuously into the cabinet air.
- Transfer leftovers and prepared foods into airtight containers, which create micro-humidity zones that improve freshness and limit moisture release.
- Use clear containers where possible so you can assess contents without prolonged door opening.
- Avoid stacking items on top of each other in ways that obstruct the path between vents and the rest of the shelf space.
Pro Tip: Place a small fridge thermometer at the back of the lowest shelf. If the reading is more than 2°C warmer than the top shelf, airflow is being obstructed and reorganisation is needed.
Do door seals cause fridge condensation?
Door gaskets are the rubber seals running around the perimeter of the fridge door, and their function is to create an airtight barrier that prevents warm, humid room air from entering the cabinet. A gasket that is dirty, cracked, or deformed allows a continuous trickle of warm air into the fridge, which condenses on cold surfaces and is frequently mistaken for a thermostat fault. Gasket maintenance is one of the most cost-effective fridge condensation solutions available to homeowners.
Testing gasket integrity
The dollar bill test is a practical method for checking whether a gasket is sealing correctly. Close the fridge door on a banknote so that it is held between the gasket and the cabinet frame. If the note slides out without resistance, the gasket is not creating an adequate seal and requires attention. Repeat this test at several points around the door perimeter, as gaskets often fail in localised sections rather than uniformly.
Cleaning and conditioning gaskets
Cleaning gaskets with warm soapy water and conditioning them with food-grade lubricants restores pliability and reduces warm air ingress. Dirty gaskets are a more common cause of seal failure than physical damage, and a thorough clean resolves the problem in many cases without requiring replacement. Applying a thin layer of food-grade silicone grease or petroleum jelly after cleaning conditions door gaskets to remain pliable, preserving seal quality over time.
The table below compares the two main gasket conditions and the appropriate response for each:
| Gasket Condition | Recommended Action |
|---|---|
| Dirty but physically intact | Clean with warm soapy water, dry thoroughly, apply food-grade silicone grease |
| Cracked, torn, or permanently deformed | Replace the gasket; source a model-specific replacement from the manufacturer |
One additional consideration applies to certain modern refrigerators. Some KitchenAid and similar models include a heater on vertical seals to prevent exterior condensation during periods of high ambient humidity. If your fridge has this feature, verify that it is functioning correctly before assuming the gasket itself is the source of the problem. Refer to your appliance manual or the manufacturer’s product help pages for guidance on testing this component.
How to clear the defrost drain and manage internal moisture
The defrost drain hole is a small opening, usually located at the rear interior wall of the fridge, that channels melt water from the defrost cycle into a collection tray beneath the appliance. When this drain becomes blocked with food debris or ice, water has nowhere to go and pools on the fridge floor or beneath the crisper drawers. A clogged defrost drain is frequently responsible for condensation buildup and water pooling inside fridges, yet it is one of the most overlooked maintenance tasks.
Clearing the drain is straightforward and requires no specialist tools:
- Locate the drain hole at the rear of the fridge interior, typically behind the lower shelves or beneath the vegetable drawers.
- Use a pipe cleaner or a turkey baster filled with warm water to flush the drain clear of any debris or ice blockage.
- Pour a small amount of warm water into the drain hole to confirm that water flows freely through to the collection tray below.
- Wipe the surrounding area dry and replace any shelving or drawers that were removed during the process.
Beyond the drain, moisture management inside the fridge involves several complementary practices. Produce requires dual humidity control: high humidity in vegetable drawers keeps greens fresh, whereas sealed storage for other items prevents condensation from forming. Many modern fridges include adjustable humidity sliders on crisper drawers, and setting these correctly for the type of produce stored makes a measurable difference to moisture levels.
Pro Tip: Place a dry paper towel at the bottom of each crisper drawer. It absorbs excess moisture and prevents produce from sitting in water. Replace it weekly to maintain hygiene and effectiveness.
The following additional habits reduce internal moisture release on a daily basis:
- Cover all food items with lids, cling film, or airtight containers before placing them in the fridge
- Dry washed fruit and vegetables thoroughly before storage, as surface water evaporates and raises cabinet humidity
- Avoid storing open cans in the fridge, as the exposed metal and liquid surface release moisture continuously
- Wipe down fridge walls and shelves with a dry cloth during routine cleaning to remove any accumulated condensation
When should you call a professional about fridge condensation?
DIY fixes such as cleaning gaskets or adjusting the thermostat resolve the majority of condensation issues without professional intervention. However, persistent frost or water pooling after completing all the steps above indicates a deeper mechanical fault that requires a qualified engineer.
The following signs suggest that the problem extends beyond routine maintenance:
- Condensation returns within 24–48 hours of cleaning gaskets and adjusting temperature settings
- Frost accumulates heavily on the rear wall of the fridge compartment, suggesting a defrost system fault
- Water pools beneath the fridge despite a clear drain, pointing to a blocked or displaced drain tube
- The fridge runs continuously without cycling off, indicating a possible thermostat or compressor fault
- Unusual noises accompany the condensation, such as clicking or humming from the compressor area
Attempting to repair thermostat components or compressor faults without the appropriate training carries a risk of further damage and may void the appliance warranty. A qualified engineer can diagnose the root cause accurately and carry out the repair safely.
Elserve provides domestic appliance repair services across London, covering fridge models from manufacturers including Beko, Hotpoint, Samsung, and LG. Booking a diagnostic visit before the problem worsens is generally more cost-effective than waiting until a mechanical fault causes food spoilage or appliance failure.
Key takeaways
Stopping condensation in fridges requires consistent management of temperature, airflow, door seals, and drainage rather than any single corrective action.
| Point | Details |
|---|---|
| Set the correct temperature | Keep the fridge between 1.5°C and 3°C and allow 24 hours after any adjustment. |
| Maintain clear airflow | Leave a 2–3 cm buffer around internal vents and store food in airtight containers. |
| Inspect and clean door gaskets | Use the banknote test regularly and condition gaskets with food-grade silicone grease. |
| Clear the defrost drain | Flush the drain hole with warm water periodically to prevent pooling and moisture buildup. |
| Seek professional help when needed | Persistent condensation after DIY fixes indicates a mechanical fault requiring a qualified engineer. |
What i have learned from years of fridge condensation calls
The calls Elserve receives about fridge condensation follow a predictable pattern. A homeowner notices water on the shelves or frost on the rear wall, adjusts the temperature dial once, and assumes the problem is resolved. Two weeks later, the moisture returns. The underlying issue is almost always a combination of factors rather than a single cause, and addressing only one of them produces only temporary relief.
What I have observed consistently is that user habits account for a larger share of condensation problems than appliance faults. Leaving the fridge door open while preparing a meal, storing warm leftovers without cooling them first, and neglecting gasket cleaning for months at a time each contribute incrementally. The cumulative effect is significant, even though no single instance seems consequential.
The detail that most homeowners overlook is the defrost drain. It is rarely mentioned in appliance manuals and is not visible during routine use, yet a partial blockage can cause water pooling that mimics the symptoms of a gasket failure or thermostat fault. Checking and clearing it takes less than five minutes and has resolved problems that appeared far more serious.
My advice is to treat fridge maintenance as a quarterly routine rather than a reactive task. Clean the gaskets, check the drain, verify the temperature with a standalone thermometer, and reorganise the shelves to restore airflow. These four actions, carried out consistently, will prevent the majority of condensation issues from developing in the first place.
— Viktor
Persistent fridge condensation? Elserve can help
When routine maintenance has not resolved the moisture problem, the fault is likely mechanical and requires professional diagnosis. Elserve offers reliable appliance repairs across London, with two-hour appointment slots that minimise disruption to your household. The team covers a wide range of fridge brands and models, from Beko and Hotpoint to Samsung and LG, and can identify faults with thermostats, compressors, drainage systems, and door seals accurately. Whether the issue is a blocked drain tube or a failing defrost system, Elserve’s engineers carry the parts and expertise to resolve it on the first visit in most cases. Do not allow a persistent condensation problem to compromise your food or your appliance.
FAQ
What is the ideal temperature to prevent fridge condensation?
The recommended fridge temperature is 1.5°C to 3°C (35°F to 38°F), with the freezer at -18°C (0°F). Temperatures outside this range increase the likelihood of condensation or frost formation.
How do i test whether my fridge door seal is causing condensation?
Close the fridge door on a banknote and attempt to slide it out. If it moves without resistance, the gasket is not sealing correctly and should be cleaned or replaced.
Can overpacking a fridge cause condensation?
Yes. Overpacking blocks cold air circulation, creating humid pockets that promote condensation and accelerate food spoilage. Leave a 2–3 cm buffer zone around internal air vents.
How do i clear a blocked defrost drain in my fridge?
Locate the drain hole at the rear interior wall of the fridge and flush it with warm water using a turkey baster or pipe cleaner. This clears debris and ice that cause water to pool inside the cabinet.
When should i call an engineer about fridge condensation?
Contact a qualified engineer if condensation persists after adjusting the temperature, cleaning the gaskets, and clearing the drain. Recurring moisture or frost suggests a thermostat, compressor, or defrost system fault that requires professional repair.
Recommended
Recent Post

ELSERVE Joins Which? Trusted Traders
2026-09-30 15:29:14

How to fix a slow spin cycle in your washing machine
2026-09-20 03:37:36

Appliance repair call-out fee: what London homeowners pay
2026-09-07 09:04:41
Looking for a fast and reliable appliance repair service?




ELSERVE is a registered company in England. Registered number 09798443. VAT number 407675383
Some images used on this website are stock photographs used for illustrative purposes only and may not depict ELSERVE employees, customers, or actual service visits



-
ELSERVE Joins Which? Trusted Traders
2026-09-30 15:29:14
-
How to fix a slow spin cycle in your washing machine
2026-09-20 03:37:36
-
Appliance repair call-out fee: what London homeowners pay
2026-09-07 09:04:41